Montessori Science Curriculum What is the introduction to science in Montessori? “Adults work to finish a task, but the child works in order to grow, and is working to create the adult, the person that is to be.”
Experiment 1:Making an Anemometer
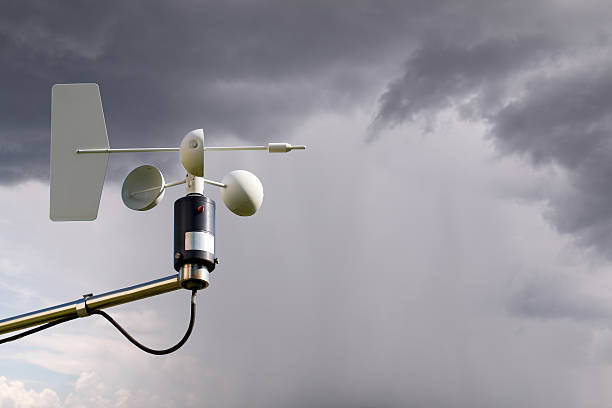
Anemometer is a device used by meteorologists to measure the speed of wind.
Material
- 2 pieces of balsa wood or cardboard strips (length: 12 inches, breadth: ¼ inch)
- Wooden post ( size 1 x1 inch)
- 3 white paper cups (small size)
- 1 colored paper cup (small size)
- Large size nail which can accommodate the beads
- 3 beads (large size)
- Glue
- Hammer
- Stopwatch
Presentation Montessori Science Curriculum
- Place all the required material on a table.
- Explain to the student that this experiment will demonstrate how an anemometer can be made and how to measure the speed of wind with the help of an anemometer.
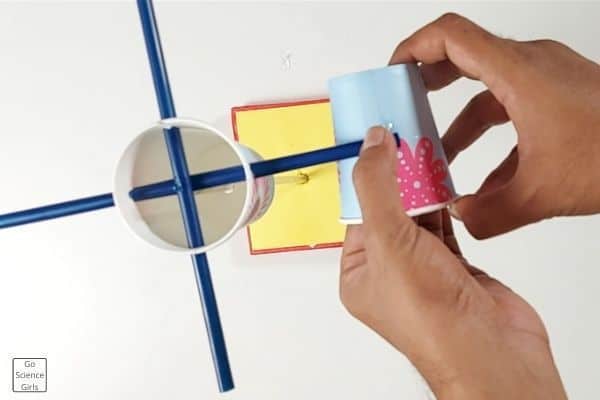
- Make a cross with the balsa wood sticks using the glue. Let the glue dry out.
- Now make a hole in the center of the cross. Use nails for it.
- Glue the cups to the four ends of the sticks ensuring they all are faced in the same direction.
Points to Remember
- Line up all the experiments to be performed in the classroom at the beginning of the year, so that they can be taught to the child at `teachable moment`.
- Obtain the child’s consent to begin the experiment.
- Introduce the name and purpose of the experiment.
- Familiarize the child with the apparatus demonstrating how to hold the apparatus and perform the activity.
- Take the child’s help to perform small tasks. This will keep the child interested.
- Make sure that the language used during the experiment should be as per the child’s development & his understanding with the material.
- The apparatus must be clean.
- Remove damaged things from the environment until they are properly adjusted.
- Science experiments can help the child to familiarize with the fundamental concepts of sciences.
- Read out the instructions on packaging of materials begin used in experiments to the children.
- Be cautious about any kind of allergies to any children in the classroom.
- Give practical life lessons regarding the safe handling and usage of materials like, scissors, matches, knives, dishwashing detergent etc.
- Remember to properly dispose of all the material that can be harmful.
- Take the nail, insert one bead and cross in the nail through the hole in the center of the cross and the remaining two beads.
- Hammer the nail having beads and cross on the topic of the wooden post.
- Place the wooden place at a site where wind can reach from all directions.
- Observe that the anemometer turns when the wind blows.
- Using a stopwatch counts the number of times the colored cup passes in one minute.
Experiment 2: Cold Hands
Material
- Your Hands
- Your Arms
- Your Legs
Presentation Introduction Montessori Science Curriculum
- Say “This experiment will show what happens when we rub the things together”.
- Slowly rub your cold hands together. Notice if they still feel cold?
- Now rub the hands with higher speed. Feel that they are getting warmer.
- 4.Next, rub your thighs up and down with your hands speedily. Notice that hands and legs are getting warmer this time .
- Now cross your arms and rub the top of your arms with hands rapidly. This will warm both your hands and arms.
- Introduce the children with the term friction. Tell them that when things are rubbed together the force of friction is created between them which causes heat.
Experiment 4: Siphon
A siphon is a continuous tube that allows liquid to drain from a reservoir without pumping. An intermediate point in the tube higher or lower in concentration than the reservoir allies the flow to drain due to difference in hydrostatic pressure. Moreover the final end of the tube is kept lower than the liquid surface in the reservoir to avoid any hindrance when the liquid drains.
Material
- Bucket (small in size)
- Water
- Rubber pipe (1 meter in length)
- 2 Small Cards labeled as “Bucket A ” and “Bucket B”.
Exercise
- Move the material to the workplace.
- Take the two buckets and place one on a stool and the other on the floor.
- Paste the labels on the bucket with gum. Label the bucket on the stool as “bucket A” and bucket on the floor as “Bucket B”.
- Fill the Bucket A with water and dip one end of the pipe in it.
- Suck a little through the other end of the pipe and put it in the Bucket B.
- Observe that the water starts flowing in bucket B.
- As all the water is shifted in bucket B, change the position of the buckets.
- Invite the child to repeat the exercise.
- Tell the students that this tube is called “SIPHON”.
Experiment 4:Making an Egg Go Soft
Material
- Raw egg
- A glass jar with wide opening
- Vinegar
- Tongs
Presentation Introduction Montessori Science Curriculum
- Take a jar and fill it with vinegar.
- Put the egg into a vinegar filled jar to make sure that the vinegar covers the egg completely.
- Leave it for 24 to 36 hours.
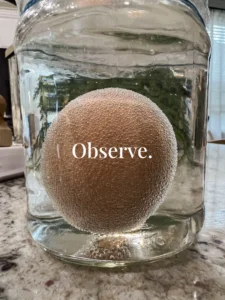
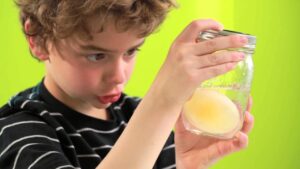
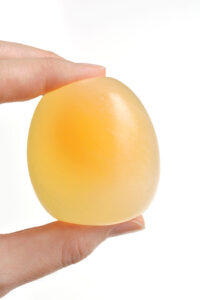
- Check the jar after 36 hours. You will observe that the shell has been dissolved leaving the inner membrane intact and blubbery.
- Carefully take out the egg from the jar and rinse with clear water. You will find the egg intact and squishy soft.
Extensions to the Exercise Introduction Montessori Science Curriculum
- Hold the egg up to a light, look in and draw what you see.
- Cut the egg & see if the yolk is still firm or squishy? Take photos.
- Replace vinegar with sugar water, soda pop, pineapple juice, plain water and do the same experiment .
- Use clam shell, tooth, and bone instead of egg and follow the same procedure.
Experiment 5:Making a Rain Gauge
A rain gauge is a device used by hydrologists and meteorologists to know the level of rainfall.
Material
- A glass jar
- A ruler
- A piece of paper
- A pencil
- A rainy day
- Tape
Purpose
- To give the concept that rain can be measured.
- To enable the children to make and use rain gauges.
- To enable the children to predict weather.
Presentation Introduction Montessori Science Curriculum
- Place all the required material on a table.
- Explain to the students that this experiment is carried out to make a rain gauge that will help us to measure the amount of rainfall.
- Place the ruler on the side of the jar and attach with the tape. The rain gauge is ready.
- When the rain is over, measure the amount of water collected in the jar by looking at the ruler. This will tell the amount of rain fallen in millimeters or inches.
- Record the reading over the entire rainy season.
Extension
Encourage the children to predict rainfall by looking for signs in nature e.g. clouds, sky color, birds, smelling the air, etc.
Age : 5 +
Experiment 6:Coloured Flowers 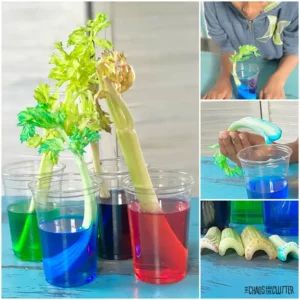
Material
- Scissors
- Food colors
- A plastic cup
- Light colored flowers (preferably white)
Purpose
To observe that the stem conducts water upward to the leaves.
Presentation Introduction Montessori Science Curriculum
- Take the cup and fill it with water
- Add a few drops of food coloring
- Take the flower, cut the end of the stem and put in the water.
- Watch the petals of the flowers starting to change in color as the food coloring is sucked up by the stem.
- Tell the students that plants suck up water from the ground through their roots, which reaches the whole plant through the stem .
Extension
- Take a flower with a long, thick stem
- Cut the stem carefully from the bottom and put the end of the stem in separate test tubes having different food colorings.
- Observe that the flower has petals in two different colors.
- Age: 4 +
